Amazon Web Services (AWS) is one of the most popular cloud platforms in the world, and Amazon EC2 (Elastic Compute Cloud) is its core offering for creating virtual servers. If you’ve ever wondered how to launch an EC2 instance and take your first steps in cloud computing, this guide is for you. Whether you’re a developer, student, or small business owner, we’ll walk you through the process in simple, clear language.
Why Use Amazon EC2?
Amazon EC2 offers unmatched scalability and flexibility for running applications in the cloud. Here are some key benefits:
- Pay-As-You-Go Pricing: No need to invest in expensive hardware. You pay only for what you use.
- Global Reach: Deploy instances in multiple AWS regions worldwide.
- Customizability: Choose the operating system, hardware specifications, and network settings that best fit your needs.
- Reliability: AWS’s robust infrastructure ensures high uptime and performance.
Prerequisites for Setting Up EC2
Before we begin, ensure you have the following:
- An AWS Account: Sign up at aws.amazon.com if you don’t already have one.
- Basic Cloud Knowledge: Don’t worry if you’re a beginner; this guide will simplify the process.
- SSH Client: Required to connect to your instance later. Windows users can use tools like PuTTY, while Linux and macOS users can use the built-in terminal.
Step 1: Logging into the AWS Management Console
- Navigate to the AWS Management Console.
- Enter your email and password to log in. Then, you’ll see the AWS dashboard, your central hub for managing AWS services.
Step 2: Navigate to the EC2 Service
- In the search bar at the top of the dashboard, type EC2 and click on the result.
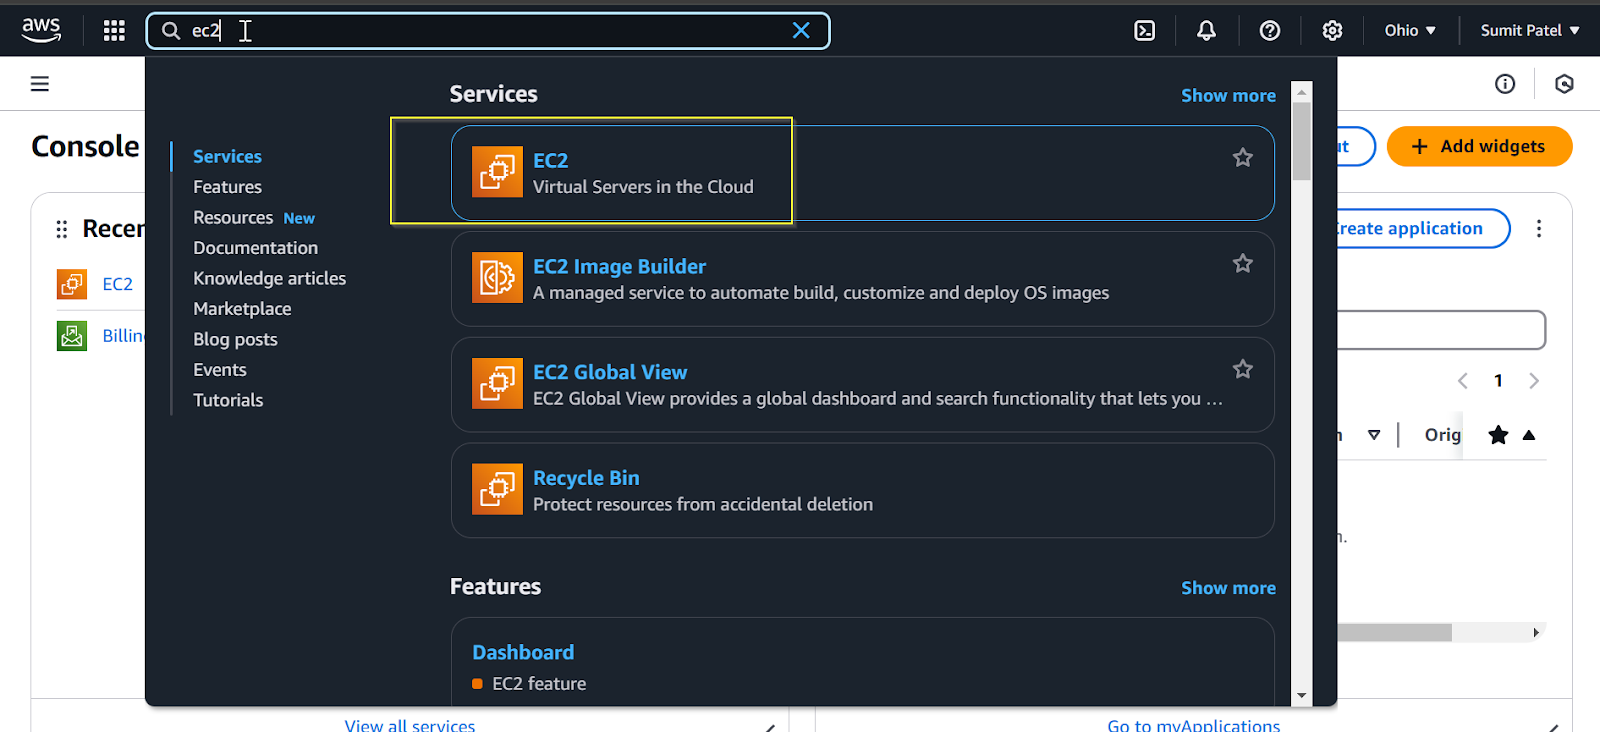
- This takes you to the EC2 dashboard, where you can launch and manage your instances.

Before proceeding, select the desired region from the top-right corner of the AWS Management Console. This ensures your EC2 instance is created in your preferred availability zone. Once selected, proceed to the EC2 dashboard
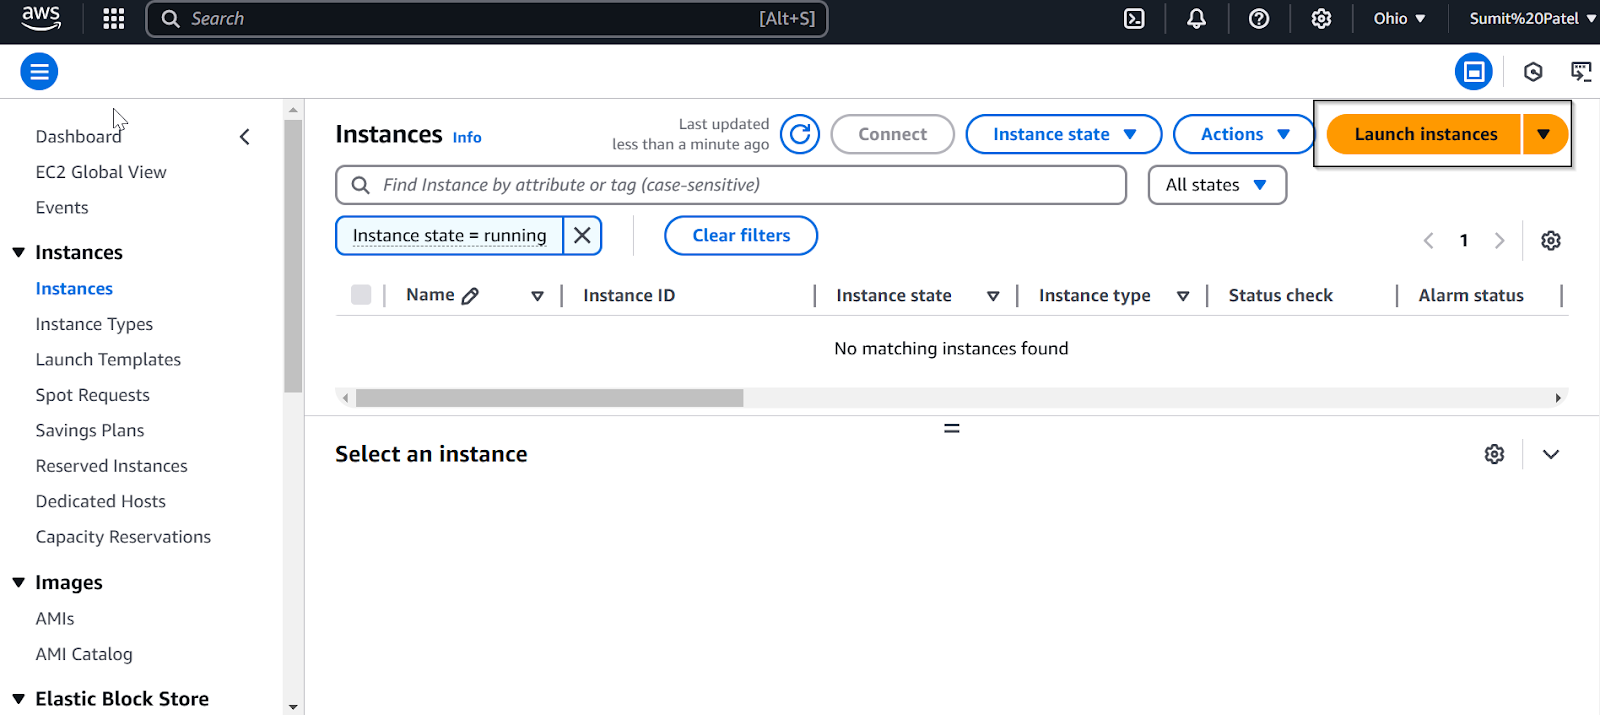
Step 3: Launching Your First EC2 Instance
- Click on the Launch Instance button to start the setup.
- In the Name and tags section, provide a name for your instance (e.g., “MyFirstEc2Instance”).

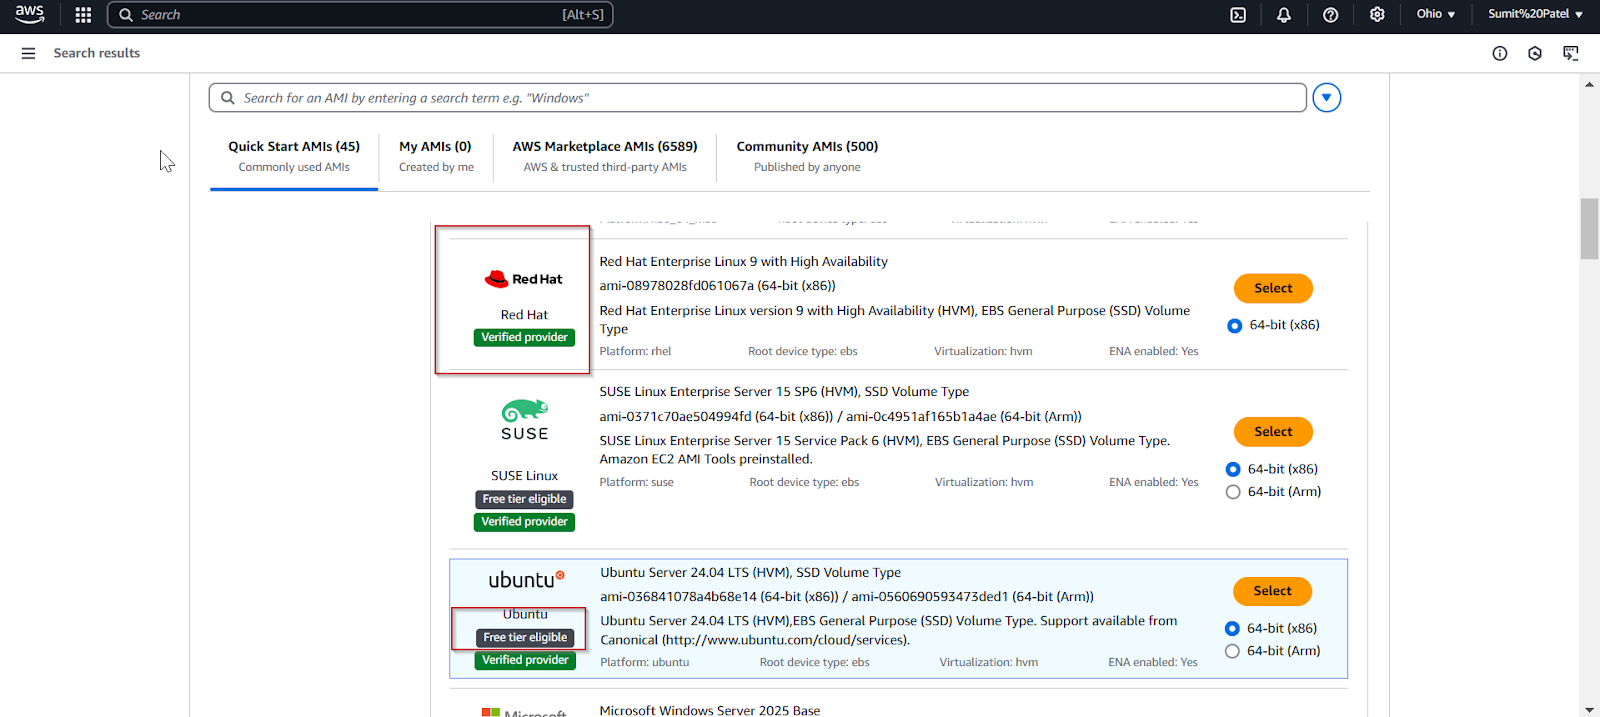
Step 4: Selecting an Amazon Machine Image (AMI)
- Choose an AMI, which determines the operating system for your instance. For this guide, I’m selecting Ubuntu as it’s beginner-friendly and widely supported. Ensure you pick a free-tier eligible version if you’re just starting out.
As shown in the screenshot, you can identify free-tier eligible options by the ‘Free tier eligible‘ label next to the AMI.
Step 5: Choose an Instance Type
- Select an instance type based on your resource needs. For the free tier, you can pick t2.micro, which includes 1 vCPU and 1 GB of memory.

Step 6: Configuring a Key Pair
- As shown in the image above, under ‘Key pair (login),’ you can either create a new key pair or select an existing one
- If creating a new key pair, download the .pem file. This file is crucial for accessing your instance later. Keep it secure.

Step 7: Configure Security Groups
- In the Network settings, ensure SSH (port 22) is enabled. This allows you to connect to the instance remotely.
- Add other rules as needed, such as HTTP (port 80) for web servers.
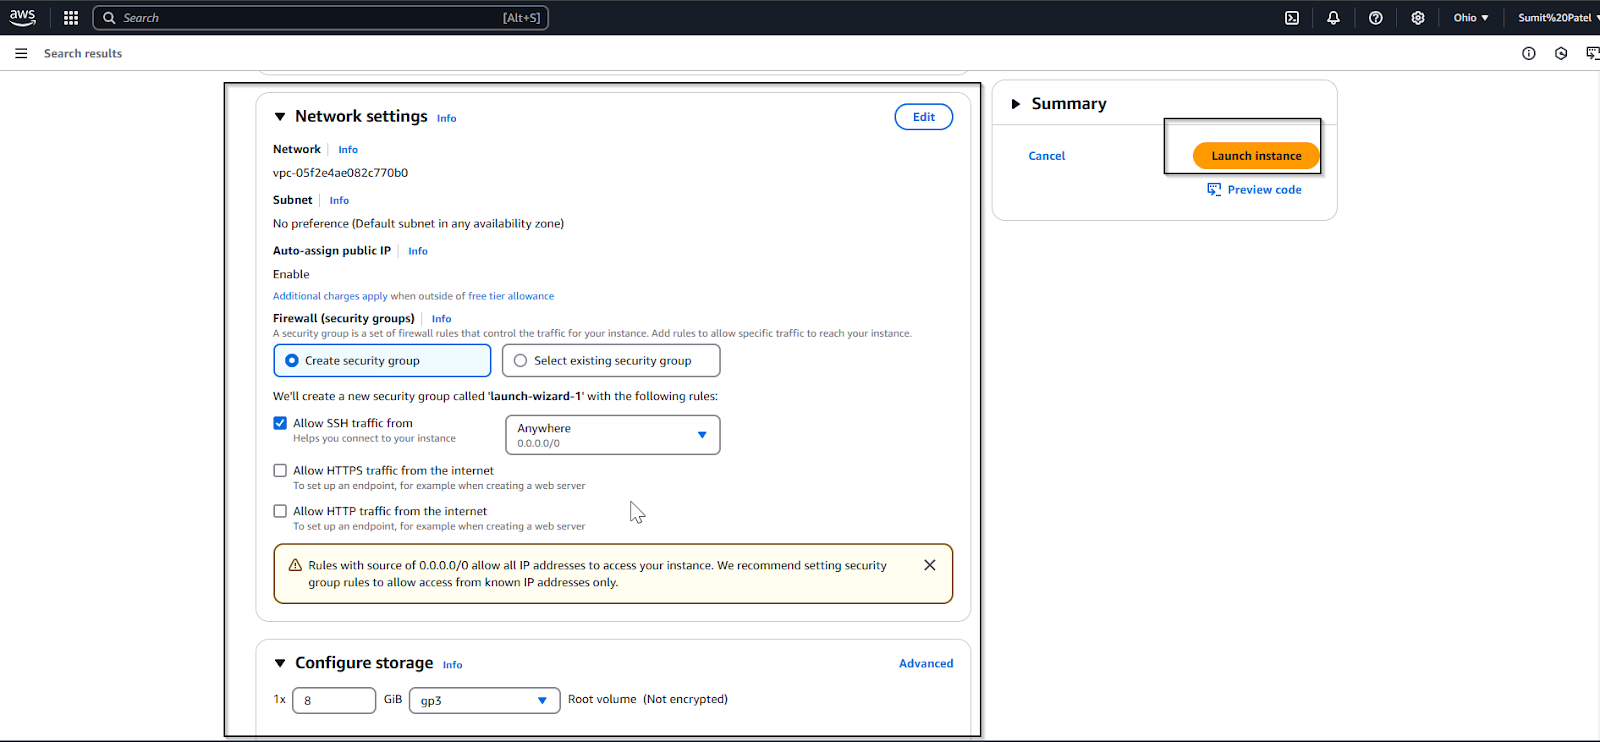
Step 8: Adjust Storage Settings
- As shown in the above image, AWS provides 8 GB of free storage by default. You can increase this based on your requirements and use case if needed.
Step 9: Launch Your Instance
- Review all your configurations to ensure everything is correct.
- Click Launch Instance to deploy your virtual server.
Step 10: Verify the Instance Status
- Return to the EC2 dashboard and click on Instances in the sidebar.
- Locate your instance and ensure its status is Running. If it’s initializing, wait a few minutes.

Step 11: Connect to Your EC2 Instance
- Select your instance and click ‘Connect.’ After that, you will see the screen below.

To connect to your EC2 instance, follow these steps as demonstrated in the provided screenshot:
Navigate to the Connect to Instance page.
- Under the Connection Type, select EC2 Instance Connect. This option allows you to connect using the browser-based terminal with the instance’s public IPv4 address.
- Ensure the default username (e.g., ubuntu) is entered under the Username field.
- Click on the orange Connect button to open the integrated terminal directly in your browser.
Additionally, AWS provides other connection options, such as:
- Session Manager
- SSH Client
- EC2 Serial Console
You can explore these alternatives if they suit your requirements better or for advanced use cases.
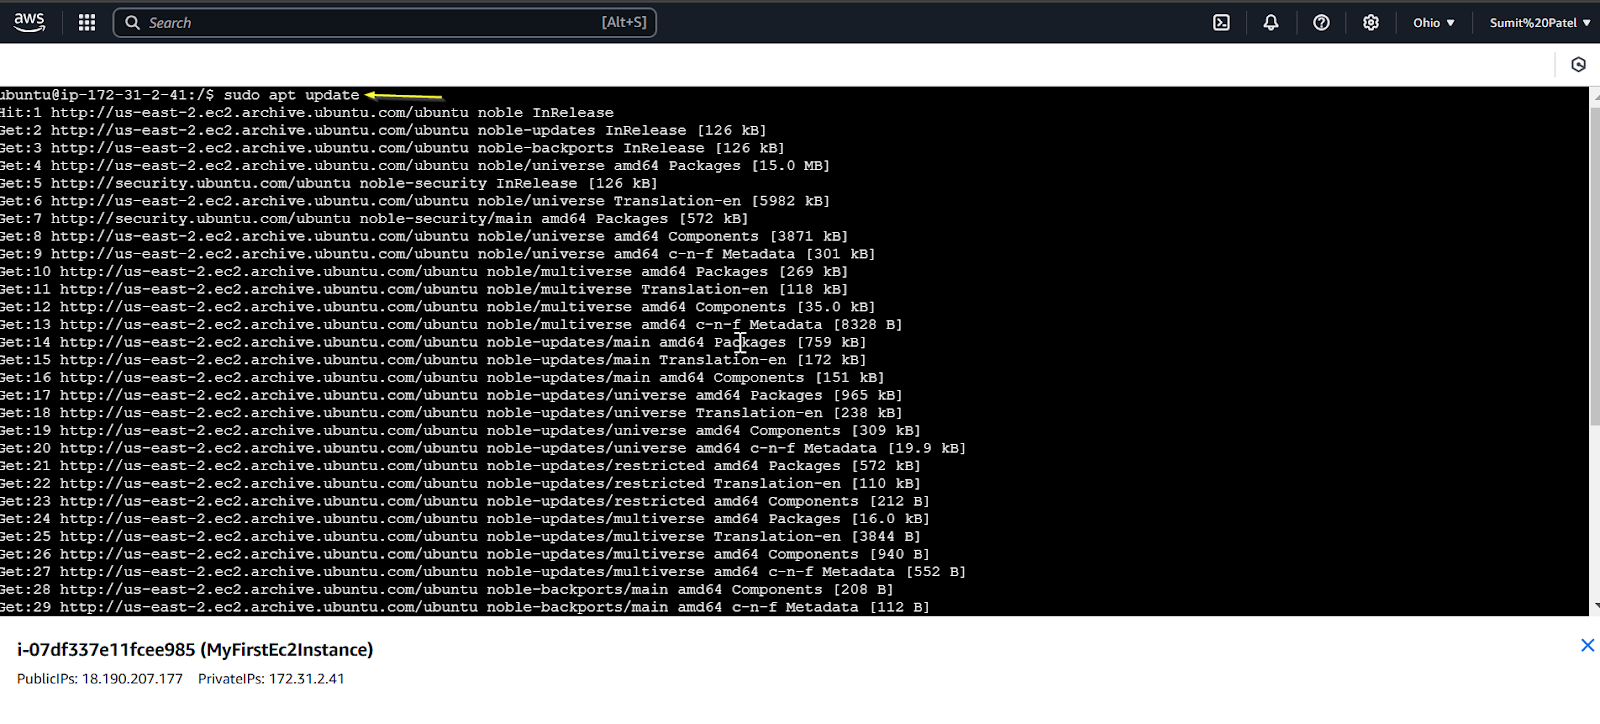
Once you’re logged in, it’s recommended to update your system. You can do this by opening the terminal and running the following command to ensure your system is up-to-date.
sudo apt update && sudo apt upgrade
Common Troubleshooting Tips
1. Can’t Connect via SSH?
- Ensure port 22 is open in your security group settings.
- Verify the IP address and use the correct key pair file.
2. Instance Won’t Start?
- Check your AWS usage limits. Some regions may have restrictions.
3. Lost Key Pair?
- Unfortunately, AWS does not let you recover lost key pair files. You’ll need to create a new key pair and update your instance’s settings manually.
Conclusion
Congratulations! You’ve successfully set up your first EC2 instance. With this foundation, you’re ready to explore the endless possibilities of AWS cloud computing. Stay tuned for more tutorials to take your skills to the next level. If you found this guide helpful, share it with others who are starting their cloud journey!
If you’re interested in DevOps, you can check out my detailed guide on Unlock the Power of DevOps A Beginner’s Toolkit.
Related Resources: