Automating your CI/CD process with Jenkins and GitHub helps streamline your development workflow by automatically building and deploying your applications. In this guide, we’ll set up Jenkins and GitHub for a Node.js application, though the steps can easily be adapted for other languages like Python, Java, or Ruby
This setup ensures that every time you push code to your GitHub repository, Jenkins will automatically fetch, build, and deploy your application, eliminating manual intervention and reducing errors.
Let’s dive into the setup!
Table of Contents
- Prerequisites
- Installing Required Plugins in Jenkins
- Creating a Jenkins Job
- Setting Up a GitHub Webhook
Before starting, ensure you have the following set up:
1. Prerequisites
Ubuntu 24.04 Server
- If you’re using AWS, create an EC2 Ubuntu instance. Follow this guide for detailed steps:
How to Create an EC2 Instance on AWS (Beginner’s Guide).
Jenkins Installed and Running
- Make sure Jenkins is installed and configured on your Ubuntu 24.04 server. Refer to this guide for installation instructions:
How to Install Jenkins on Ubuntu 24.04.
Install Node.js, npm, PM2, and Nginx on Your Jenkins Server
To ensure your Node.js application can run seamlessly, install the following on your server:
Update Your Server
- Start by updating your package list
sudo apt updateInstall Node.js and npm
- Use the following command to install Node.js and npm:
sudo apt install nodejs npm -yInstall PM2
- PM2 is a process manager for Node.js applications.
- Verify the installation
sudo npm install -g pm2
pm2 --version
Install Nginx
- Nginx is a web server often used as a reverse proxy for Node.js applications
- Start and enable Nginx to run on boot.
- Check the Nginx status to confirm it is running.
sudo apt install nginx -y
sudo systemctl start nginx
sudo systemctl enable nginx
sudo systemctl status nginx
GitHub Account with a Repository
- Ensure you have a GitHub account and a repository ready for your Node.js application.
Once you have completed these prerequisites, you can proceed with configuring Jenkins and GitHub for automated CI/CD.
2. Installing Required Plugins in Jenkins
To integrate GitHub and Node.js builds, you need the following Jenkins plugins:
- Git Plugin: To pull code from your GitHub repository.
Steps to Install Plugins:
- Log in to Jenkins and navigate to Manage Jenkins > Manage Plugins.
- Go to the Available tab and search for each plugin.
Select the plugins and click Install without restart.
3. Creating a Jenkins Job
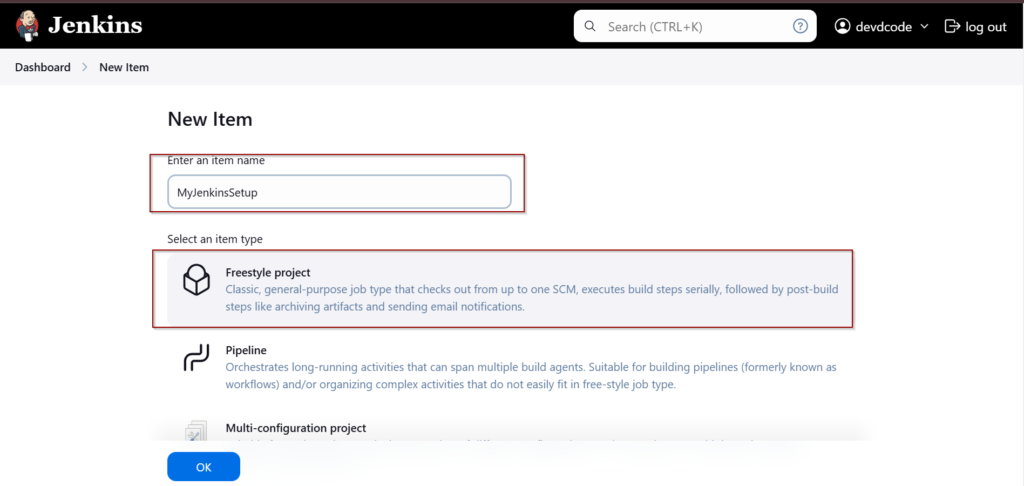
Create a New Item:
- Go to the Jenkins dashboard and click New Item.
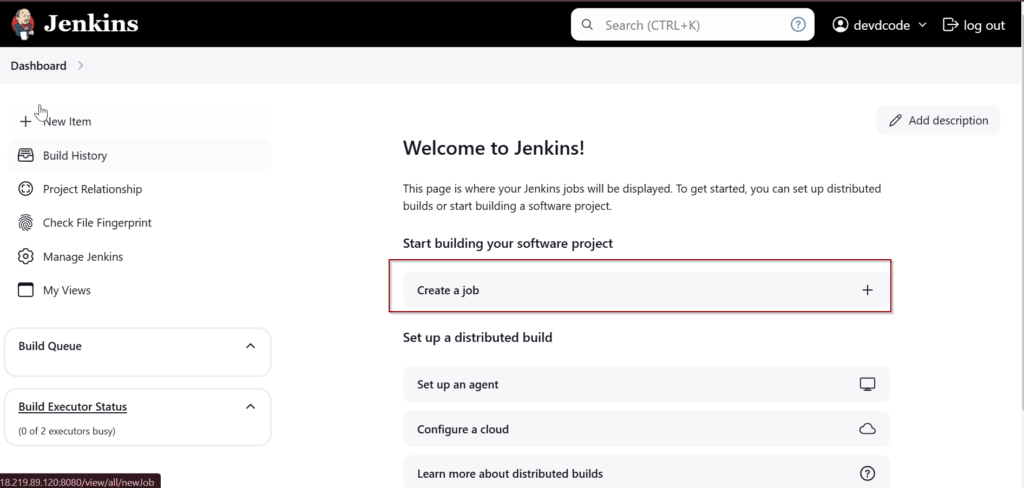
- Enter a name for your job (e.g., MyJenkinsSetup) and select Freestyle project.
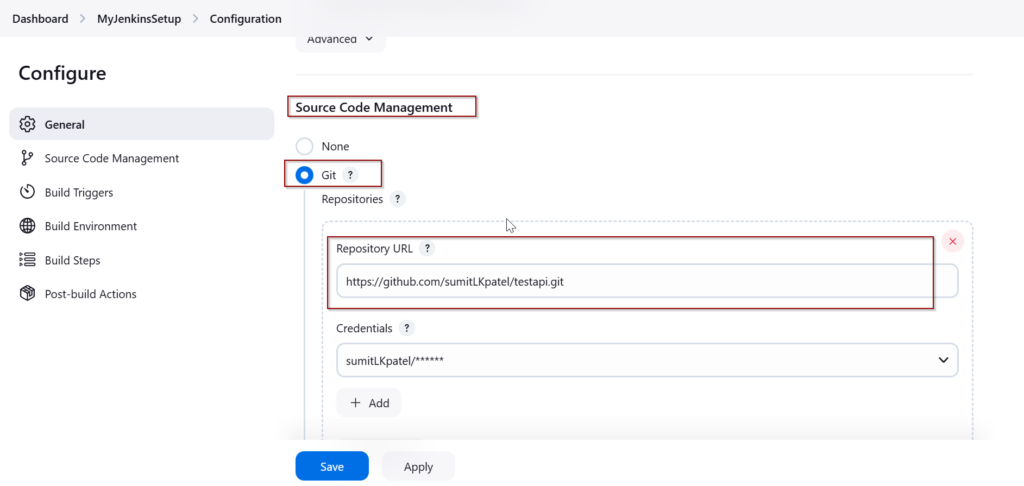
Configure the Job:
- Source Code Management
- Choose Git.
- Add your repository URL: https://github.com/your-username/your-repo.git.
- Provide credentials if the repository is private.
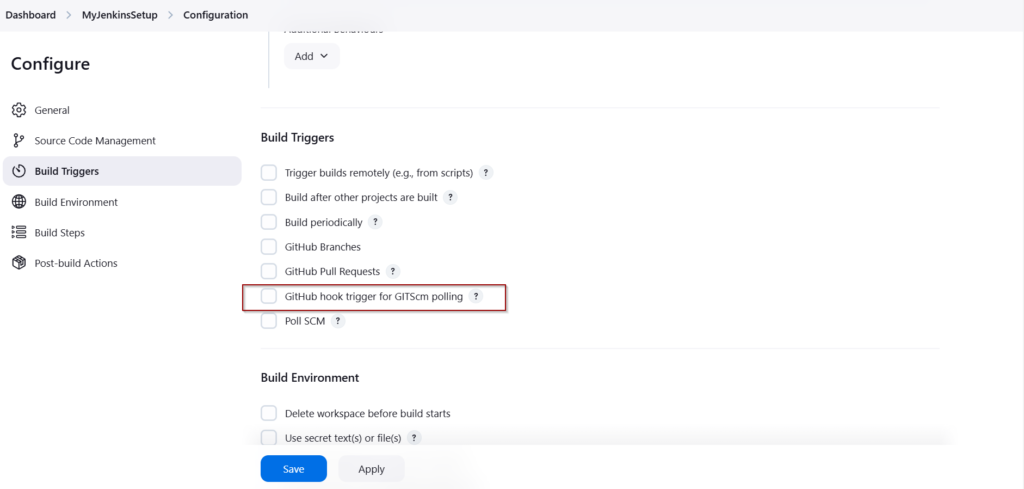
Build Triggers:
- Check the GitHub hook trigger for GITScm polling
Build Steps:
- Add a build step: Execute Shell.
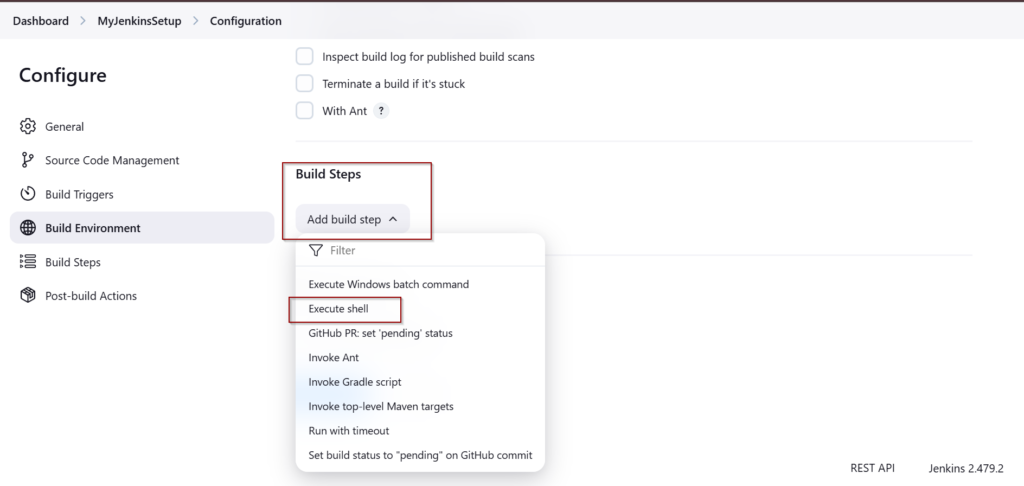
Use the following script to deploy, build and run tests:
#!/bin/bash

# Variables
DEST_DIR="/var/www/html/api"  # Target directory
PORT=3000                           # Port your app is using
USER=$(whoami)                # Current user
APP_NAME="my-app"

# Check if the source directory exists
if [ ! -d "$DEST_DIR" ]; then
    echo "Target directory $DEST_DIR does not exist. Creating it..."
    sudo mkdir -p "$DEST_DIR"
fi

# Copy the files to the target directory
echo "Copying files to $DEST_DIR..."
sudo cp -r ./* "$DEST_DIR"

# Set permissions
echo "Setting permissions..."
sudo chown -R "$USER:$USER" "$DEST_DIR"
sudo chmod -R 755 "$DEST_DIR"

# Run npm install
echo "Running npm install..."
cd "$DEST_DIR" || exit
npm install --production

echo "Checking if app $APP_NAME is already running in PM2..."
APP_PID=$(pm2 pid $APP_NAME)

if [ -n "$APP_PID" ]; then
    echo "App $APP_NAME is running. Deleting it from PM2..."
    pm2 delete $APP_NAME  # Delete the app from PM2 by name
else
    echo "No app named $APP_NAME is currently running."
fi
pm2 delete $APP_NAME

# Start the app with PM2 (using node index.js command)
echo "Starting the app with PM2..."
pm2 start "index.js" --name $APP_NAME

# Ensure PM2 will restart the app after a server reboot
pm2 startup

# Force save the current process list to synchronize it
echo "Synchronizing PM2 process list..."
pm2 save

# Display the list of PM2 processes
echo "Displaying PM2 process list..."
pm2 list

echo "Deployment and app start completed with PM2!"
Save and Apply Changes: Click Save to create the job, and then click the Build Now button to test a manual build. If your build is successful, you will see a green checkmark, as shown in the below image.
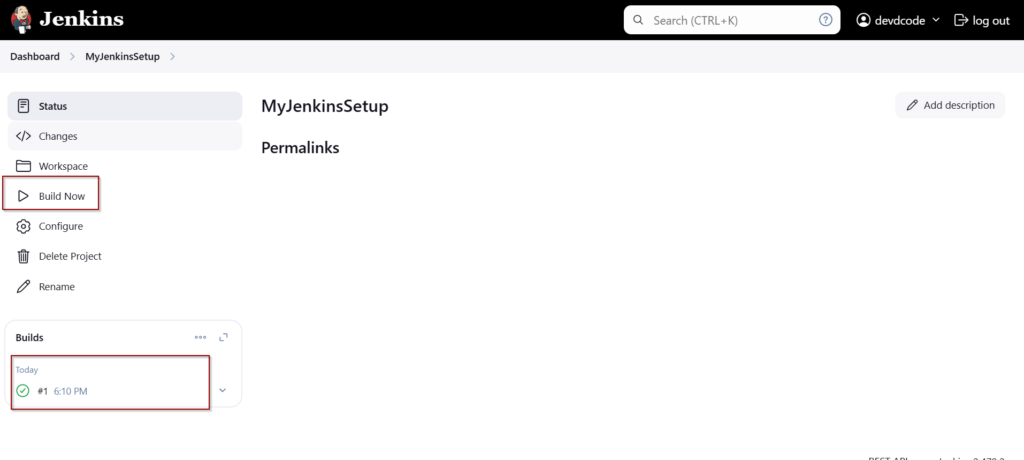
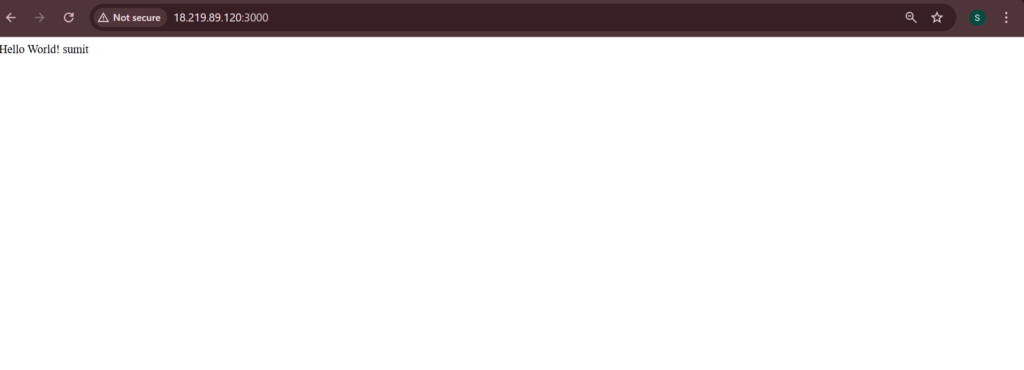
If the build is successful, try running your app in the browser. If everything works correctly, you will see your app running.
4. Setting Up a GitHub Webhook
Webhooks allow GitHub to notify Jenkins whenever changes are pushed to the repository.
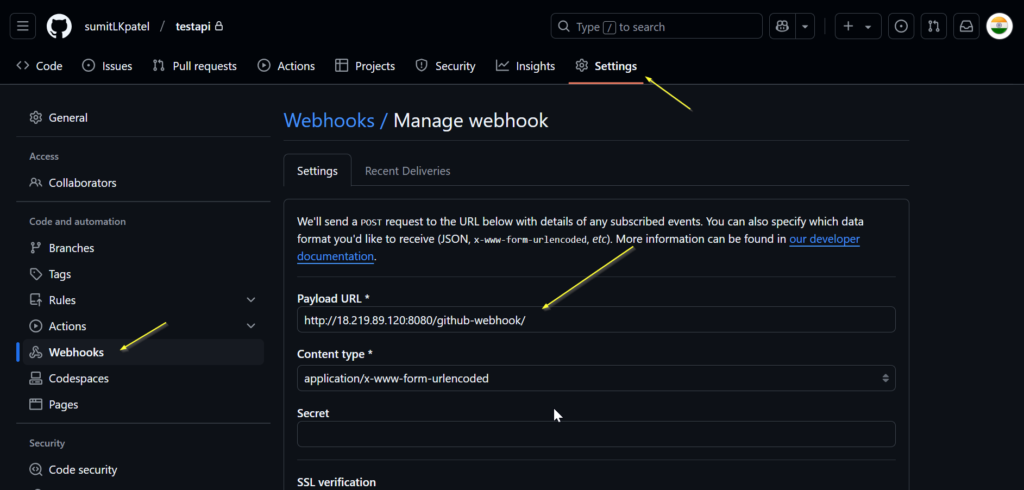
Go to Repository Settings:
- In your GitHub repository, navigate to Settings > Webhooks.
- Click Add webhook.
- In the Payload URL field, enter: http://your-server-ip:8080/github-webhook/
- Choose Just the push event.
- Click Add webhook.
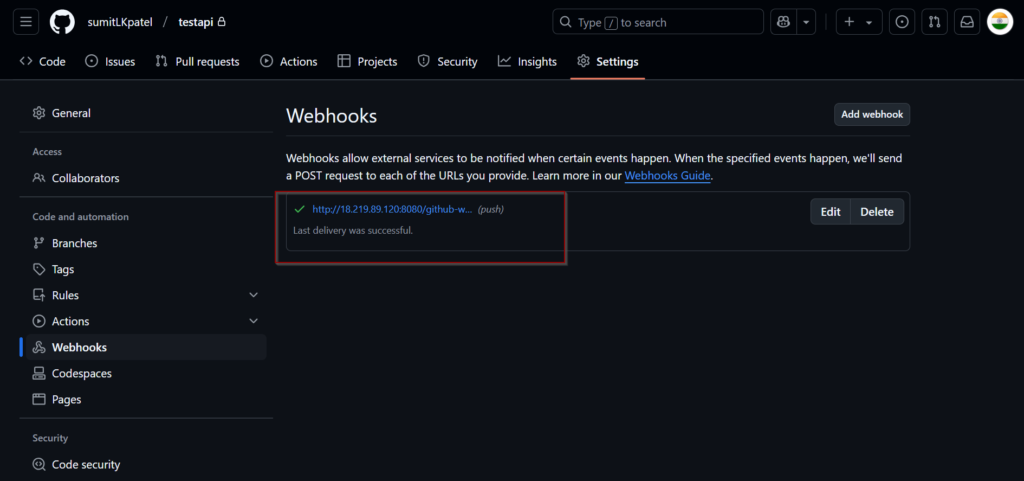
If the Webhook connection is established successfully, you will see a green checkmark, indicating that the connection is active.
Test the Webhook:
- Push your changes to your GitHub repository to trigger the build through the configured webhook. This will automatically start the build process without requiring any manual intervention

Immediately after pushing your changes to the GitHub repository, you will see that the build is triggered. Once the build is successfully completed, your latest code will be deployed and running on the server.
Conclusion
By following this guide, you have set up a Node.js application with GitHub and Jenkins using webhooks and the Execute Shell build step. This setup automates the build process, ensuring that every time you push code changes to the repository, Jenkins triggers a new build. As a result, your testing and deployment processes become faster, more efficient, and less prone to errors. This streamlined workflow saves time, enhances productivity, and supports seamless integration and deployment.
For further reading, you might find these links useful:
We’d love to hear your thoughts! Feel free to share your feedback or ask any questions in the comments section below.